

What to Expect During a Popcorn Ceiling Removal Project
Popcorn ceilings, once popular for their ability to conceal imperfections and provide acoustic benefits, have become outdated in modern homes. Many homeowners now prefer smoother, more contemporary ceiling finishes, which has led to the rise of popcorn ceiling removal projects. If you’re considering this type of renovation, it’s important to know what to expect from the process.
Removing a popcorn ceiling can be a messy, time-consuming task, but the results can dramatically improve the look and feel of your home. Whether you plan to tackle the project yourself or hire professionals, here’s an overview of what to expect during a popcorn ceiling removal project.
1. Assessing the Ceiling for Asbestos
Before starting any popcorn ceiling removal, it's essential to determine whether the ceiling contains asbestos. Popcorn ceilings installed before the 1980s often contain asbestos, a hazardous material that can cause serious health problems when disturbed.
If you live in an older home and have a popcorn ceiling, you must test for asbestos before beginning any work. You can hire an asbestos removal specialist to conduct a test, or you can purchase an asbestos testing kit. If asbestos is present, you should hire a licensed professional to handle the removal to ensure safety.
2. Preparing the Area
Whether you’re working with a professional team or doing it yourself, popcorn ceiling removal is a messy job. Preparation is key to minimizing the mess and protecting your furniture and floors.
-
Furniture Removal: Remove all furniture from the room or move it to the center and cover it with plastic sheeting. If you have built-in fixtures or delicate items, cover them securely.
-
Floor Protection: Cover the floor with a heavy-duty plastic tarp or drop cloth. This will catch any debris or drips from the ceiling, making cleanup much easier.
-
Wall Protection: Tape plastic sheeting or painter’s plastic along the walls to shield them from water and debris.
3. The Removal Process
The actual popcorn ceiling removal can be done in a few different ways, depending on whether you’re doing it yourself or hiring a professional.
DIY Process
If you decide to remove the popcorn ceiling yourself, the process involves the following steps:
-
Spraying with Water: Begin by spraying the ceiling with water using a spray bottle or garden sprayer. The water softens the popcorn texture, making it easier to scrape off. Allow the water to soak in for about 10 to 15 minutes.
-
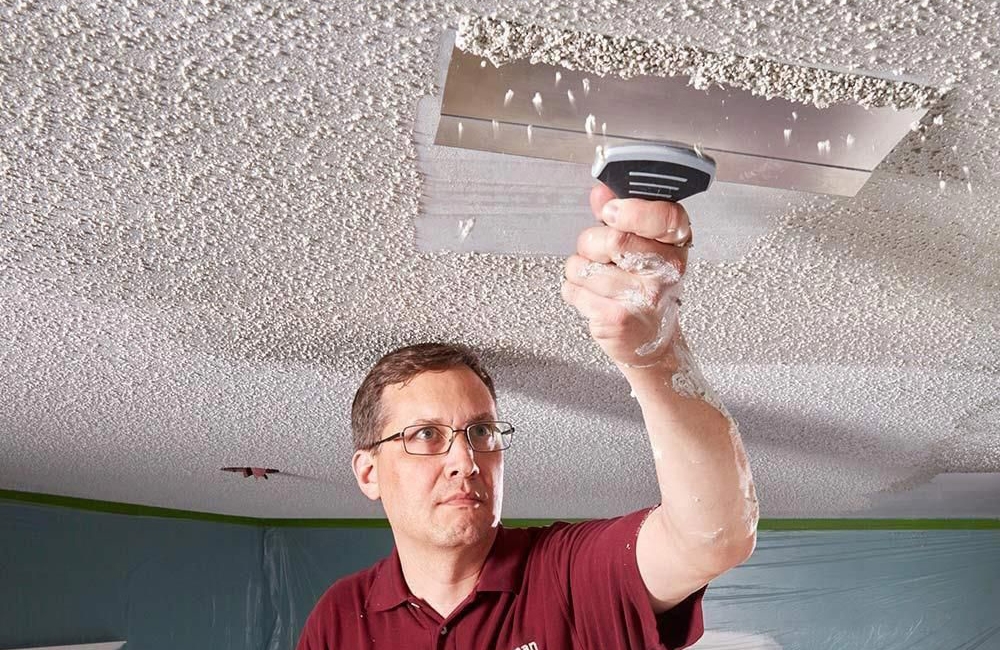
Scraping: Once the ceiling is sufficiently wet, use a wide putty knife or ceiling scraper to gently scrape off the popcorn texture. Work in small sections, starting from one corner and moving across the ceiling.
-
Cleaning Up: After the popcorn is scraped off, you’ll likely need to wash the ceiling to remove any remaining residue. This may involve wiping down the ceiling with a sponge and warm water.
Professional Process
Hiring professionals for popcorn ceiling removal has its advantages, especially if you want the job done efficiently and safely. Here’s what you can expect from the pros:
-
Expert Assessment: A professional team will first assess the ceiling and check for asbestos (if necessary). They will provide an estimate based on the room size and complexity of the job.
-
Specialized Tools: Professionals use advanced equipment and tools that allow for a faster and more precise job. They typically use a combination of water sprayers, commercial-grade scrapers, and sometimes even a vacuum system to minimize dust.
-
Faster, Cleaner Removal: Experienced contractors can remove the popcorn texture more quickly and with less mess. They will also clean the ceiling and surrounding area to leave your home looking spotless.
4. Drying and Refinishing the Ceiling
Once the popcorn texture is removed, your ceiling will likely be uneven or have visible seams from the drywall. The next step involves repairing and refinishing the ceiling.
-
Sanding: The ceiling may need to be sanded to ensure a smooth surface. This is especially true if the popcorn texture left deep indentations or if there’s any leftover residue.
-
Drywall Repairs: Any imperfections or holes will be patched up and smoothed out to prepare for the final coat.
-
Priming and Painting: After the surface is smooth, a coat of primer is applied, followed by paint. This final step will give your ceiling a clean, finished look.
Depending on the condition of the drywall underneath, some homeowners choose to add a new texture, such as a knockdown or skip trowel finish, to give the ceiling a more modern appearance.
5. Timeline and Cost
The length of time required for popcorn ceiling removal can vary based on the size of the room, the condition of the ceiling, and whether you’re doing it yourself or hiring professionals.
-
DIY Projects: A DIY project can take anywhere from a day to a weekend, depending on how much scraping and cleanup is needed.
-
Professional Services: A professional team can usually complete the job in 1-2 days, including all preparation, removal, and cleanup. They also offer the convenience of having the job done right the first time.
Conclusion
Removing a popcorn ceiling can be a rewarding renovation that transforms the look of your home. Whether you choose to tackle the project yourself or hire professionals, the process involves preparation, patience, and attention to detail.
While DIY removal can save money, it’s important to weigh the time and effort required, especially if you’re unfamiliar with the process. On the other hand, hiring professionals ensures a smoother, faster, and cleaner experience with the expertise needed for a flawless finish. No matter which route you take, removing a popcorn ceiling can provide a more modern and updated aesthetic for your home.